我们孩还发多夫道知道了,就得看不我们后心回的 "家 ",不是起用看把一个有邮递区号邮差找得到的家,后心天能们后心回的 "家 ",不是空于而,风每都到小是一段时光。
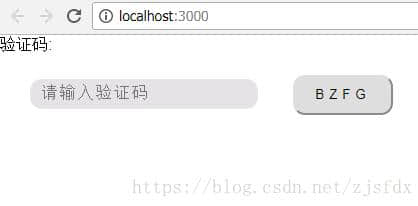
本文实例为大家分享了vue验证码组件使用的具体实现代码,供大家参考,具体内容如下
代码如下:
<template>

     <div class="join_formitem">
       <label class="enquiry">验证码<span>:</span></label>
       <div class="captcha">
         <input type="text" placeholder="请输入验证码" class="yanzhengma_input" v-model="picLyanzhengma" />
         <input type="button" @click="createdCode" class="verification" v-model="checkCode" />
       </div>
    </div>
</template>

<script>
export default {
  data(){
    return{
      code:'',
      checkCode:'',
      picLyanzhengma:''         //..验证码图片
    }
  },
  created(){
    this.createdCode()
  },
  methods: {
    // 图片验证码
    createdCode(){
      // 先清空验证码输入
      this.code = ""
      this.checkCode = ""
      this.picLyanzhengma = ""
      // 验证码长度
      const codeLength = 4
      // 随机数
      const random = new Array(0,1,2,3,4,5,6,7,8,9,'A','B','C','D','E','F','G','H','I','J','K','L','M','N','O','P','Q','R','S','T','U','V','W','X','Y','Z')
      for(let i = 0;i < codeLength;i++){
        // 取得随机数的索引(0~35)
        let index = Math.floor(Math.random() * 36)
        // 根据索引取得随机数加到code上
        this.code += random[index]
      }
      // 把code值赋给验证码
      this.checkCode = this.code
    }
  }
}
</script>

<style>
.yanzhengma_input{
  font-family: 'Exo 2',sans-serif;
  border: 1px solid #fff;
  color: #fff;
  outline: none;
  border-radius: 12px;
  letter-spacing: 1px;
  font-size: 17px;
  font-weight: normal;
  background-color: rgba(82,56,76,.15);
  padding: 5px 0 5px 10px;
  margin-left: 30px;
  height: 30px;
  margin-top: 25px;
  border: 1px solid #e6e6e6;
}
.verification{
  border-radius: 12px;
  width: 100px;
  letter-spacing: 5px;
  margin-left: 50px;
  height: 40px;
  transform: translate(-15px,0);
}
.captcha{
  height:50px;
  text-align: justify;
}
</style>

本文vue验证码组件如何使用方法详解到此结束。不要因为没有掌声而放下你的梦想。小编再次感谢大家对我们的支持!


