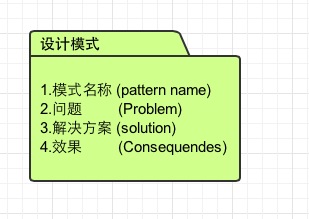
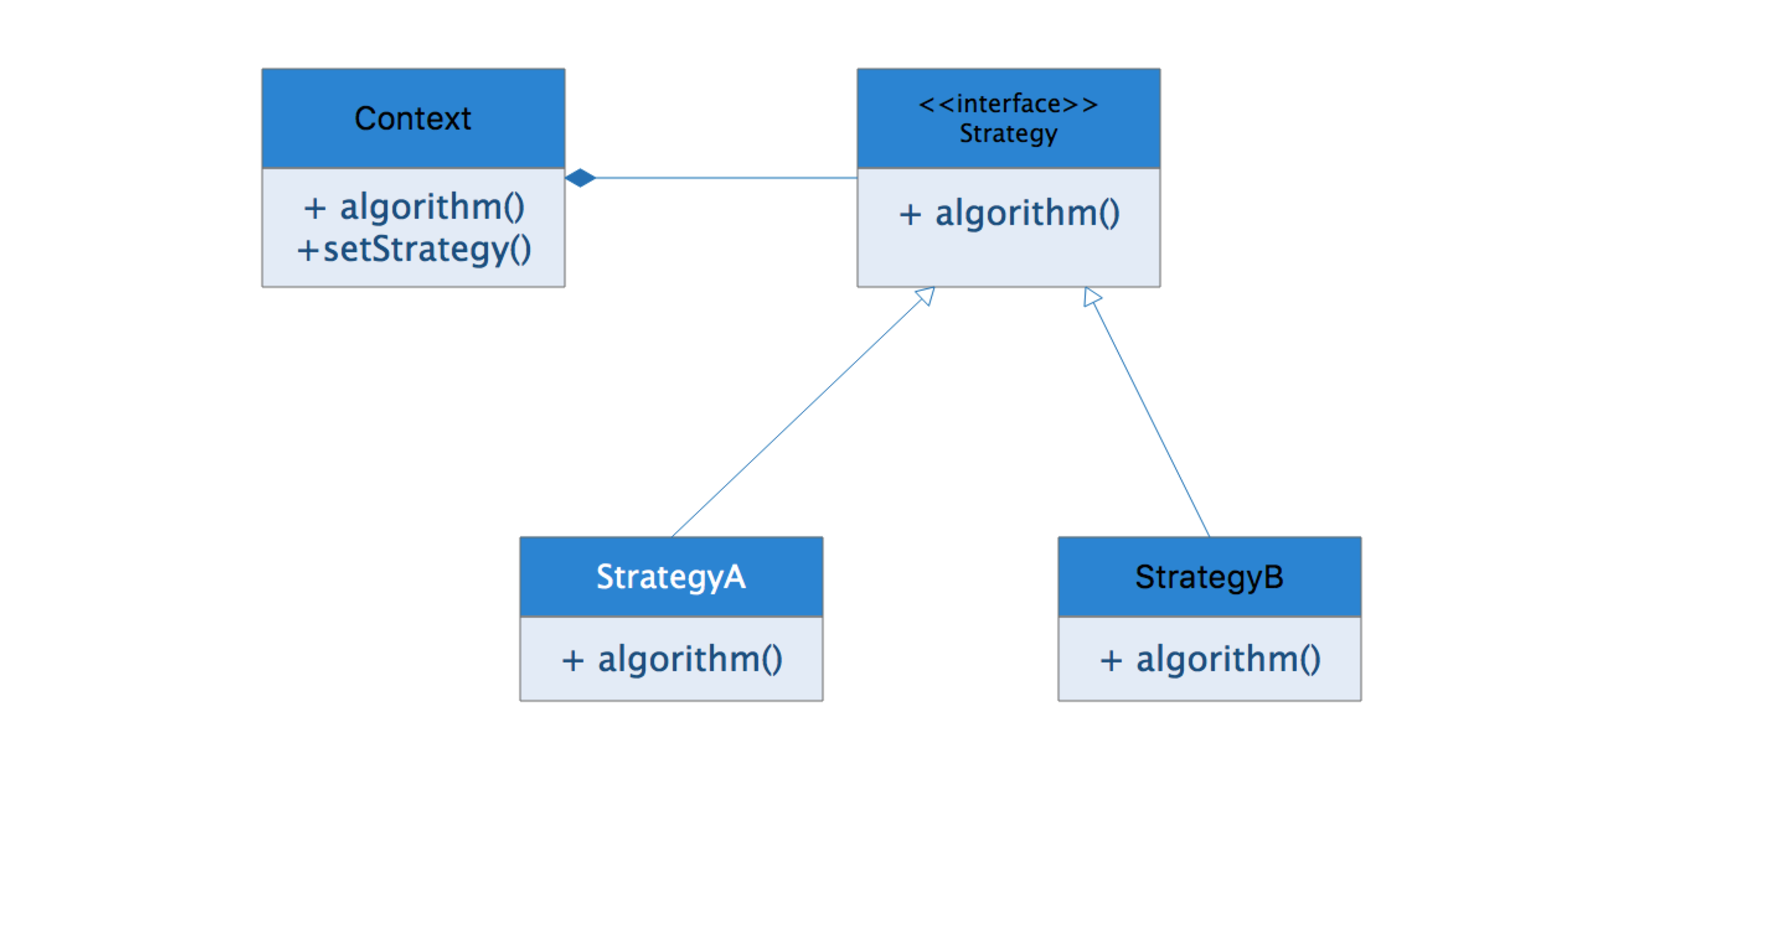
设计模式分为三种类型,共23种:
创建型模式:单例模式、抽象工厂模式、建造者模式、工厂模式、原型模式
结构型模式:适配器模式、桥接模式、装饰模式、组合模式、外观模式、享元模式、代理模式
行为型模式:模板方法模式、命令模式、迭代器模式、观察者模式、中介者模式、备忘录模式、解释器模式、状态模式、策略模式
本文主要讲解的是:
创建型模式:单例模式、建造者模式、工厂模式、
结构型模式:适配器模式、代理模式
行为型模式:模板方法模式、策略模式
对应的GitHub项目地址:https://github.com/kkzhilu/DesignPattern
可以下载进行深入的理解
创建型模式例子
单例模式:
对应的类: SingleTon.java
参考博客:http://www.runoob.com/design-pattern/singleton-pattern.html
|
01
02
03
04
05
06
07
08
09
10
11
12
13
14
15
16
17
18
19
20
21
22
23
24
25
26
27
28
29
30
31
32
33
34
35
36
37
38
39
40
41
42
43
44
45
46
47
48
49
50
51
52
53
54
|
/**** 创建型模式 ---- 单例模式* * @author kxm*/public class SingleTon { /*** * 单例设计模式的一般定义:一个类中只允许有一个实例。 实现思路:让类的构造方法私有化,同时提供一个静态方法去实例化这个类。 * * 懒汉式:在静态方法中初始化。时间换空间。(不推荐,时间很重要) 饿汉式:在声明对象就初始化。空间换时间。(推荐,空间不是问题) * * 懒汉式线程不安全,需要加上同步锁,同步锁影响了程序执行效率 饿汉式天生线程安全,类加载的时候初始化一次对象,效率比懒汉式高。 * * 注意私有构造方法 */ // 定义成私有构成方法,变成单例的 单例模式的核心 private SingleTon() {} // 饿汉式:类加载的时候即进行初始化 private static final SingleTon single = new SingleTon(); public static SingleTon getTeacher() { return single; } /******************************* 分割线 *********************************/ // 懒汉式 双重校验锁保证线程安全,比较好的写法 --- volatile 禁止指令重排 主要由于new SingleTon();可能出现问题 private volatile static SingleTon myTest = null; public static SingleTon geTest() { if (myTest == null) { synchronized (SingleTon.class) { if (myTest == null) { myTest = new SingleTon(); } } } return myTest; } /*** * 较为标准的写法 --- 静态内部类写法 * 是否 Lazy 初始化:是 * 是否多线程安全:是 * @author kxm */ private static class SingletonHolder { private static final SingleTon INSTANCE = new SingleTon(); } public static final SingleTon getInstance() { return SingletonHolder.INSTANCE; }} |
工厂模式:
简单工厂 --- SimpleFactoryTon.java:
|
01
02
03
04
05
06
07
08
09
10
11
12
13
14
15
16
17
18
19
20
21
22
23
24
25
26
27
28
29
30
31
32
33
34
35
36
37
38
39
40
41
42
43
44
45
46
47
|
/**** 创建型模式 ---- 工厂模式 (简单工厂模式)* @author kxm*/public class SimpleFactoryTon { public Car creatCarFactory(int num) { Car car = null ; switch (num) { case 1: car = new Car("东风雪铁龙"); break; case 2: car = new Car("东风雪铁龙","红色"); break; default: car = new Car(); break; } return car; }}class Car{ private String band; private String color; public Car() {} public Car(String band) { this.band = band; } public Car(String band, String color) { this.band = band; this.color = color; } public String getBand() { return band; } public void setBand(String band) { this.band = band; } public String getColor() { return color; } public void setColor(String color) { this.color = color; }} |
工厂方法模式:
参考博客:https://www.jianshu.com/p/d0c444275827
|
01
02
03
04
05
06
07
08
09
10
11
12
13
14
15
16
17
18
19
20
21
22
23
24
25
26
27
28
29
30
31
32
33
34
35
36
37
38
39
40
41
42
43
44
45
46
47
48
49
50
51
52
53
54
55
56
57
58
59
60
61
62
63
64
|
abstract class Factory{ public abstract Product Manufacture();}public class FactoryA extends Factory { @Override public Product Manufacture() { return new ProductA(); }}public class FactoryB extends Factory { @Override public Product Manufacture() { return new ProductB(); }}abstract class Product{ public abstract void Show();}public class ProductA extends Product { //具体产品A类 @Override public void Show() { System.out.println("生产出了产品A"); }}public class ProductB extends Product { //具体产品B类 @Override public void Show() { System.out.println("生产出了产品B"); }}/*** 创建型模式 ---- 工厂模式 (工厂方法模式)* 相比简单工厂的优点:* 更符合开-闭原则* 符合单一职责原则* 不使用静态工厂方法,可以形成基于继承的等级结构* * 参考文档:https://www.jianshu.com/p/d0c444275827* @author kxm*/public class TestFactory { public static void main(String[] args) { //客户要产品A FactoryA mFactoryA = new FactoryA(); mFactoryA.Manufacture().Show(); //客户要产品B FactoryB mFactoryB = new FactoryB(); mFactoryB.Manufacture().Show(); }} |
建造者模式:
参考博客:https://blog.csdn.net/u010102390/article/details/80179754
|
001
002
003
004
005
006
007
008
009
010
011
012
013
014
015
016
017
018
019
020
021
022
023
024
025
026
027
028
029
030
031
032
033
034
035
036
037
038
039
040
041
042
043
044
045
046
047
048
049
050
051
052
053
054
055
056
057
058
059
060
061
062
063
064
065
066
067
068
069
070
071
072
073
074
075
076
077
078
079
080
081
082
083
084
085
086
087
088
089
090
091
092
093
094
095
096
097
098
099
100
101
102
103
104
105
106
107
108
109
110
111
112
113
114
115
116
117
118
119
120
121
122
123
124
125
126
127
128
129
130
131
132
|
// 1.需要的对象定义:产品(Product)public class Human { private String head; private String body; private String hand; private String foot; public String getHead() { return head; } public void setHead(String head) { this.head = head; } public String getBody() { return body; } public void setBody(String body) { this.body = body; } public String getHand() { return hand; } public void setHand(String hand) { this.hand = hand; } public String getFoot() { return foot; } public void setFoot(String foot) { this.foot = foot; } @Override public String toString() { return "Human [head=" + head + ", body=" + body + ", hand=" + hand + ", foot=" + foot + "]"; }}// 2.定义需要对象应有的方法及返回对象的抽象方法 --- 建造者角色(Builder)public interface IBuildHuman { public void buildHead(); public void buildBody(); public void buildHand(); public void buildFoot(); public Human createHuman();}// 3.实现类实现抽象方法,进行建造 --- 具体创建者角色(ConcreteBuilder)public class SmartManBuilder implements IBuildHuman { Human human; public SmartManBuilder() { human = new Human(); } @Override public void buildHead() { human.setHead("头脑智商180"); } @Override public void buildBody() { human.setBody("身体"); } @Override public void buildHand() { human.setHand("手"); } @Override public void buildFoot() { human.setFoot("脚"); } @Override public Human createHuman() { return human; }}// 3.实现类实现抽象方法,进行建造 --- 具体创建者角色 当前为运动员public class ActiveManBuilder implements IBuildHuman { Human human; public ActiveManBuilder() { human = new Human(); } @Override public void buildHead() { human.setHead("头脑智商180"); } @Override public void buildBody() { human.setBody("身体无敌的运动员"); } @Override public void buildHand() { human.setHand("手"); } @Override public void buildFoot() { human.setFoot("脚"); } @Override public Human createHuman() { return human; }}// 4.建造模式的核心 --- 指导者(Director,进行建造组装)public class Director { public Human createHumanByDirecotr(IBuildHuman bh) { bh.buildBody(); bh.buildFoot(); bh.buildHand(); bh.buildHead(); return bh.createHuman(); }}/**** 创建型模式 ---- 建造者模式:* 1.需要的对象定义:产品(Product)* 2.定义需要对象应有的方法及返回对象的抽象方法 --- 建造者角色(Builder)* 3.实现类实现抽象方法,进行建造 --- 具体创建者角色(ConcreteBuilder)* 4.建造模式的核心 --- 指导者(Director)* @author kxm*/public class BuildTest { public static void main(String[] args) { Director director = new Director(); Human human = director.createHumanByDirecotr(new SmartManBuilder()); Human humanAgain = director.createHumanByDirecotr(new ActiveManBuilder()); System.out.println(human); System.out.println(humanAgain); }} |
测试结果:
Human [head=头脑智商180, body=身体, hand=手, foot=脚]
Human [head=头脑智商180, body=身体无敌的运动员, hand=手, foot=脚]
结构型模式例子
适配器模式:
参考博客:https://www.cnblogs.com/V1haoge/p/6479118.html
适配器模式分为三种:类适配器,对象适配器,接口适配器
前两种的主要作用相当于生活中的真实适配器,如5v的充电器需要插入220v的电压,这里就需要适配器
另外一种是接口适配器,如MouseAdapter,我们只需要重写我们需要的方法,不需要的方法就不管它,可以大大减少我们的代码量,提高效率
类适配器:
比如,我们现在有USB标准接口,但是PS2也想插入用一下,直接使用是不行的,因此需要适配器
|
01
02
03
04
05
06
07
08
09
10
11
12
13
14
15
16
17
18
19
20
21
22
23
24
25
26
27
28
29
30
31
32
33
34
35
36
37
38
39
40
41
42
43
44
45
|
public interface Usb { void isUsb();}public interface Ps2 { void isPs2();}public class Usber implements Usb { @Override public void isUsb() { System.out.println("USB口"); }}创建适配器:/**** 类适配器实现思路: 适配器继承标准类,实现需要适配的接口,实现接口内方法即可* @author kxm*/public class UsbAdapter extends Usber implements Ps2 { @Override public void isPs2() { super.isUsb(); }}测试类:/**** 结构型模式:适配器模式 --- 类适配器* Usb接口,Ps2接口,无法直接互相使用,因此通过类适配器的方式,进行适配* 文章参考:https://www.cnblogs.com/V1haoge/p/6479118.html* * 类适配器与对象适配器的使用场景一致,仅仅是实现手段稍有区别,二者主要用于如下场景:* (1)想要使用一个已经存在的类,但是它却不符合现有的接口规范,导致无法直接去访问,这时创建一个适配器就能间接去访问这个类中的方法* (2)我们有一个类,想将其设计为可重用的类(可被多处访问),我们可以创建适配器来将这个类来适配其他没有提供合适接口的类* @author kxm*/public class TestAdapter { public static void main(String[] args) { Ps2 ps2 = new UsbAdapter(); ps2.isPs2(); }} |
测试结果:
USB口 ---- 可以发现,我们调用的是Ps2的接口方法,返回的是Usb口,达到了适配的目的
对象适配器:
由于类适配器写好之后就只能针对一个类使用,因此衍生出对象适配器,代码变化不大,主要是适配器有所变化
|
001
002
003
004
005
006
007
008
009
010
011
012
013
014
015
016
017
018
019
020
021
022
023
024
025
026
027
028
029
030
031
032
033
034
035
036
037
038
039
040
041
042
043
044
045
046
047
048
049
050
051
052
053
054
055
056
057
058
059
060
061
062
063
064
065
066
067
068
069
070
071
072
073
074
075
076
077
078
079
080
081
082
083
084
085
086
087
088
089
090
091
092
093
094
095
096
097
098
099
100
101
102
103
104
|
/**** 对象适配器实现思路: 适配器实现被适配的接口,通过构造方法获取到标准对象,再把需要被适配的方法重写,替换成标准方法* @author kxm*/public class UsbObjectAdapter implements Ps2 { private Usber usb; public UsbObjectAdapter(Usber usber) { this.usb = usber; } @Override public void isPs2() { usb.isUsb(); }}测试类:public class TestObjectAdapter { public static void main(String[] args) { Usber usber = new Usber(); Ps2 ps2 = new UsbObjectAdapter(usber); ps2.isPs2(); }}结果:USB口接口适配器 --- 用来减少代码量,提高可读性:public interface A { void a(); void b(); void c(); void d(); void e(); void f();}/***** 抽象类适配接口,实现空方法* @author kxm*/public abstract class Adapter implements A { @Override public void a() { // TODO Auto-generated method stub } @Override public void b() { // TODO Auto-generated method stub } @Override public void c() { // TODO Auto-generated method stub } @Override public void d() { // TODO Auto-generated method stub } @Override public void e() { // TODO Auto-generated method stub } @Override public void f() { // TODO Auto-generated method stub }}// 真正的工具类想要使用时,继承适配器类,只需要重写我们需要的方法即可public class Ashili extends Adapter { public void a(){ System.out.println("实现A方法被调用"); }}/**** 接口适配器模式* 原理:通过抽象类来实现适配,用来减少不必要代码的效果 --- MouseAdapter* * 接口适配器使用场景:* (1)想要使用接口中的某个或某些方法,但是接口中有太多方法,* 我们要使用时必须实现接口并实现其中的所有方法,可以使用抽象类来实现接口,* 并不对方法进行实现(仅置空),然后我们再继承这个抽象类来通过重写想用的方法的方式来实现。这个抽象类就是适配器。* * 好处:不需要完全实现内部的所有方法,只需要选择有需要的去使用* @author kxm*/public class Test { public static void main(String[] args) { Ashili ashili = new Ashili(); ashili.a(); ashili.b(); ashili.c(); }} |
测试结果:
实现A方法被调用
代理模式
代理模式分为静态代理,JDK动态代理,CGLIB动态代理,三种方式,代理模式是Spring中面向切面编程的核心
静态代理:
|
01
02
03
04
05
06
07
08
09
10
11
12
13
14
15
16
17
18
19
20
21
22
23
24
25
26
27
28
29
30
31
32
33
34
35
36
37
38
39
40
41
42
43
44
45
46
47
48
49
50
51
|
// 定义普通接口public interface Subject { public void shopping();}// 普通实现类实现接口public class SuperMan implements Subject { @Override public void shopping() { System.out.println("超人要去购物了~~~"); }}// 代理类 --- 代理SuperMan这个类,增强其方法,控制其访问public class Proxy implements Subject { private SuperMan superman; public Proxy(SuperMan superMan) { this.superman = superMan; } @Override public void shopping() { //代购之前要做的事情 System.out.println("做大量的商品专业评估"); System.out.println("==========代理之前=========="); superman.shopping();//被代理人真正的业务 System.out.println("==========代理之后=========="); //代购之后要做的事情 System.out.println("代购之后的客户满意度调查"); }} // 测试类/**** 结构型模式: 代理模式 --- 静态代理* 主要的思路就是把,继承同一的接口的类A,放到继承接口的类B中调用,在调用前后可以加上新的方法* * Java中线程的设计就使用了静态代理设计模式,其中自定义线程类实现Runable接口,* Thread类也实现了Runalbe接口,在创建子线程的时候,* 传入了自定义线程类的引用,再通过调用start()方法,调用自定义线程对象的run()方法。实现了线程的并发执行。* * @author kxm */public class TestProxy { public static void main(String[] args) { SuperMan superMan = new SuperMan(); Subject subject = new Proxy(superMan); subject.shopping(); }} |
测试结果:
做大量的商品专业评估
==========方法调用之前==========
超人要去购物了~~~
==========方法调用之后==========
代购之后的客户满意度调查
JDK动态代理:
|
01
02
03
04
05
06
07
08
09
10
11
12
13
14
15
16
17
18
19
20
21
22
23
24
25
26
27
28
29
30
31
32
33
34
35
36
37
38
39
40
41
42
43
44
45
46
47
48
49
50
|
// 普通接口public interface UserService { void saveUser();}// 普通实现public class UserServiceImpl implements UserService { @Override public void saveUser() { System.out.println("调用 saveUser() 方法"); }}// 代理类 --- 进行JDK动态代理 注意Proxy.newProxyInstance()方法的参数// 参数是:被代理的类加载器,接口,重写InvocationHandler方法public class MyProxyUtil { public static UserService getProxyByJDK(UserService service) { UserService userService = (UserService) Proxy.newProxyInstance(service.getClass().getClassLoader(), service.getClass().getInterfaces(), new InvocationHandler() { @Override public Object invoke(Object proxy, Method method, Object[] args) throws Throwable { System.out.println("记录日志-开始"); Object obj = method.invoke(service, args); System.out.println("记录日志-结束"); return obj; } }); return userService; }}// 测试类/**** 通过JDK动态代理技术,还有一种是CGLIB动态代理,详情见Spring中的代码* @author kxm*/public class Test { public static void main(String[] args) { // 创建目标对象 UserService userService = new UserServiceImpl(); // 生成代理对象 UserService proxy = MyProxyUtil.getProxyByJDK(userService); // 调用目标对象方法 userService.saveUser(); System.out.println("==================================="); // 调用代理对象方法 proxy.saveUser(); }} |
测试结果:
调用 saveUser() 方法
===================================
记录日志-开始
调用 saveUser() 方法
记录日志-结束
行为型模式例子
模板方法模式:
参考博客:https://blog.csdn.net/carson_ho/article/details/54910518
模板方法模式简单来说,就是定义一个公共模板,比如说,我要做菜,做炒空心菜和蒜蓉两种菜,做这两种菜的步骤是不完全一样,但是重复的步骤有很多的过程,因此我可以定义一个炒菜模板,如下:
|
01
02
03
04
05
06
07
08
09
10
11
12
13
14
15
16
17
18
19
20
21
22
23
24
25
26
27
28
29
30
31
32
33
34
35
36
37
38
39
40
41
42
43
44
45
46
47
48
49
50
51
52
53
54
55
56
57
58
59
60
61
62
63
64
65
66
67
68
69
70
71
72
73
74
75
76
77
78
79
80
81
82
83
84
85
86
87
88
89
|
public abstract class TemplateClass { // 模板方法,用来控制炒菜的流程 (炒菜的流程是一样的-复用) // 申明为final,不希望子类覆盖这个方法,防止更改流程的执行顺序 final void cookProcess() { // 第一步:倒油 --- 一样的 this.pourOil(); // 第二步:热油 --- 一样的 this.HeatOil(); // 第三步:倒蔬菜 -- 不一样 this.pourVegetable(); // 第四步:倒调味料 -- 不一样 this.pourSauce(); // 第五步:翻炒 --- 一样的 this.fry(); } // 定义结构里哪些方法是所有过程都是一样的可复用的,哪些是需要子类进行实现的 // 第一步:倒油是一样的,所以直接实现 void pourOil() { System.out.println("倒油"); } // 第二步:热油是一样的,所以直接实现 void HeatOil() { System.out.println("热油"); } // 第三步:倒蔬菜是不一样的(一个下包菜,一个是下菜心) // 所以声明为抽象方法,具体由子类实现 abstract void pourVegetable(); // 第四步:倒调味料是不一样的(一个下辣椒,一个是下蒜蓉) // 所以声明为抽象方法,具体由子类实现 abstract void pourSauce(); // 第五步:翻炒是一样的,所以直接实现 void fry() { System.out.println("炒啊炒啊炒到熟啊"); }}炒包菜 --- 核心步骤中,蔬菜材料和调味料不同,因此如下:// 继承模板抽象类,实现尚未实现的两种抽象方法public class BaoCai extends TemplateClass { @Override void pourVegetable() { System.out.println("下锅的蔬菜是包菜"); } @Override void pourSauce() { System.out.println("下锅的酱料是辣椒"); }}炒蒜蓉 --- 核心步骤中,蔬菜材料和调味料不同,因此如下:public class SuanRong extends TemplateClass { @Override void pourVegetable() { System.out.println("下锅的蔬菜是菜心"); } @Override void pourSauce() { System.out.println("下锅的酱料是蒜蓉"); }}测试类如下:/**** 行为型模式:模版方法模式* 核心:抽象父类定义相同的部分,实现相同的方法,子类实现不同的部分* 即:现在有炒菜这个公共行为,但是炒的两个菜不同,具体来说是蔬菜和佐料,不同,因此需要重写的也是这两个部分的方法* 参考博客:https://blog.csdn.net/carson_ho/article/details/54910518* @author kxm*/public class TestTemplate { public static void main(String[] args) { BaoCai baoCai = new BaoCai(); SuanRong suanRong = new SuanRong(); baoCai.cookProcess(); System.out.println("================== 分割线 ==============="); suanRong.cookProcess(); }} |
测试结果:
倒油
热油
下锅的蔬菜是包菜
下锅的酱料是辣椒
炒啊炒啊炒到熟啊
================== 分割线 ===============
倒油
热油
下锅的蔬菜是菜心
下锅的酱料是蒜蓉
炒啊炒啊炒到熟啊
策略模式:
将算法的责任和本身进行解耦,使得:
算法可独立于使用外部而变化
客户端方便根据外部条件选择不同策略来解决不同问题
我们举一个销售策略的例子,在不同的时节,需要使用不同的销售方式,因此定义如下:
|
01
02
03
04
05
06
07
08
09
10
11
12
13
14
15
16
17
18
19
20
21
22
23
24
25
26
27
28
29
30
31
32
33
34
35
36
37
38
39
40
41
42
43
44
45
46
47
48
49
50
51
52
53
54
55
56
|
// 定义接口方法public abstract class Strategy { public abstract void show();}//为春节准备的促销活动Aclass StrategyA extends Strategy{ @Override public void show() { System.out.println("为春节准备的促销活动A"); }}//为中秋节准备的促销活动Bclass StrategyB extends Strategy{ @Override public void show() { System.out.println("为中秋节准备的促销活动B"); }}//为圣诞节准备的促销活动Cclass StrategyC extends Strategy{ @Override public void show() { System.out.println("为圣诞节准备的促销活动C"); }}定义销售人员选择策略:public class SalesMan { //持有抽象策略角色的引用 private Strategy strategy; //生成销售员实例时告诉销售员什么节日(构造方法) //使得让销售员根据传入的参数(节日)选择促销活动(这里使用一个简单的工厂模式) public SalesMan(String festival) { switch ( festival) { //春节就使用春节促销活动 case "A": strategy = new StrategyA(); break; //中秋节就使用中秋节促销活动 case "B": strategy = new StrategyB(); break; //圣诞节就使用圣诞节促销活动 case "C": strategy = new StrategyC(); break; } } //向客户展示促销活动 public void SalesManShow(){ strategy.show(); }} |
测试类展示效果:
|
01
02
03
04
05
06
07
08
09
10
11
12
13
14
15
16
17
18
19
20
21
22
23
24
25
26
27
28
29
30
31
|
/**** 行为型模式:策略模式* 定义一系列算法,将每个算法封装到具有公共接口的一系列策略类中,* 从而使它们可以相互替换 & 让算法可在不影响客户端的情况下发生变化* 优点:* 策略类之间可以自由切换* 易于扩展* 避免使用多重条件选择语句(if else),充分体现面向对象设计思想。* * 参考文档:https://www.jianshu.com/p/0c62bf587b9c* @author kxm*/public class StrategyPattern { public static void main(String[] args) { SalesMan mSalesMan ; //春节来了,使用春节促销活动 System.out.println("对于春节:"); mSalesMan = new SalesMan("A"); mSalesMan.SalesManShow(); //中秋节来了,使用中秋节促销活动 System.out.println("对于中秋节:"); mSalesMan = new SalesMan("B"); mSalesMan.SalesManShow(); //圣诞节来了,使用圣诞节促销活动 System.out.println("对于圣诞节:"); mSalesMan = new SalesMan("C"); mSalesMan.SalesManShow(); }} |
测试结果:
对于春节:
为春节准备的促销活动A
对于中秋节:
为中秋节准备的促销活动B
对于圣诞节:
为圣诞节准备的促销活动C
常用的七大设计模式就介绍到这里,之后还会继续深入,争取在实战中使用上,期待更新吧~
更多免费技术资料可关注:annalin1203


