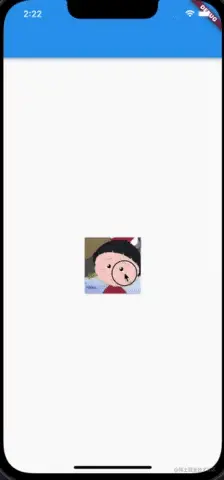
为了追求更好的用户体验,有时候我们需要一个类似心跳一样跳动着的控件来吸引用户的注意力,这是一个小小的优化需求,但是在 Flutter 里动画两件套就像裹脚布一样臭长,所以需要像封装一个 AnimatedWidget,解放生产力。
实现动画
混入 SingleTickerProviderStateMixin
当创建一个 AnimationController 时,需要传递一个vsync参数,存在vsync时会防止动画的UI不在当前屏幕时消耗不必要的资源。 通过混入 SingleTickerProviderStateMixin 。
class _MyHomePageState extends State<MyHomePage> with SingleTickerProviderStateMixin{}创建动画
创建一个间隔将近一秒钟的动画控制器:
  late final AnimationController animController;

  @override
  void initState() {
    super.initState();
    animController = AnimationController(
      duration: const Duration(milliseconds: 800),
      vsync: this,
    );
    }
心跳动画是从小变大,再变小,所以需要一个值大小变化的动画:
  late final Animation<double> animation;

  @override
  void initState() {
    super.initState();
    animController = AnimationController(
      duration: const Duration(milliseconds: 800),
      vsync: this,
    );
     animation = Tween<double>(
      begin: 0.9,
      end: 1.05,
    );
    }
心跳是不间断的,所以需要监听动画完成时恢复动画,再继续开始动画:
    animation = Tween<double>(
      begin: 0.9,
      end: 1.05,
    ).animate(animController)
      ..addListener(() {
        setState(() {});
      })
      ..addStatusListener((status) {
        if (status == AnimationStatus.completed) {
          animController.reverse();
        } else if (status == AnimationStatus.dismissed) {
          animController.forward();
        }
      });
使用缩放控件:
Transform.scale(
                scale: animation.value,
                child: const FlutterLogo(
                  size: 80,
                ),
              ),
为了跳动效果,突出跳动动画,把缩回去的时间改短:
   animController = AnimationController(
      reverseDuration: const Duration(milliseconds: 700),
      duration: const Duration(milliseconds: 800),
      vsync: this,
    );
最后别忘了释放资源:
  @override
  void dispose() {
    animController.dispose();
    super.dispose();
  }
抽离成小组件
为了每次用到类似的动画只需引入即可,需要分离动画和显示的组件。新建一个BounceWidget,包含动画,然后可以传入UI组件:
class BounceWidget extends StatefulWidget {
  final Widget child;

  const BounceWidget({
    Key? key,
    required this.child,
  }) : super(key: key);

  @override
  State<BounceWidget> createState() => _BounceWidgetState();
}
继续实现动画:
class _BounceWidgetState extends State<BounceWidget>
    with SingleTickerProviderStateMixin {
  late Animation<double> animation;
  late AnimationController animController;

  @override
  void initState() {
    super.initState();
    animController = AnimationController(
      reverseDuration: const Duration(milliseconds: 700),
      duration: const Duration(milliseconds: 800),
      vsync: this,
    );
    animation = Tween<double>(
      begin: 0.9,
      end: 1.05,
    ).animate(animController)
      ..addListener(() {
        setState(() {});
      })
      ..addStatusListener((status) {
        if (status == AnimationStatus.completed) {
          animController.reverse();
        } else if (status == AnimationStatus.dismissed) {
          animController.forward();
        }
      });
    animController.forward();
  }

  @override
  Widget build(BuildContext context) {
    return Transform.scale(
      scale: animation.value,
      child: widget.child,
    );
  }

  @override
  void dispose() {
    animController.dispose();
    super.dispose();
  }
}
去引入动画:
  Center(
              child: BounceWidget(
                child: FlutterLogo(
                  size: 80,
                ),
              ),
完整代码
void main() {
  runApp(const MyApp());
}

class MyApp extends StatelessWidget {
  const MyApp({Key? key}) : super(key: key);

  @override
  Widget build(BuildContext context) {
    return MaterialApp(
      title: 'Flutter Demo',
      theme: ThemeData(
        primarySwatch: Colors.blue,
      ),
      home: const MyHomePage(title: 'Flutter Demo Home Page'),
    );
  }
}

class MyHomePage extends StatefulWidget {
  const MyHomePage({Key? key, required this.title}) : super(key: key);

  final String title;

  @override
  State<MyHomePage> createState() => _MyHomePageState();
}

class _MyHomePageState extends State<MyHomePage> {
  @override
  Widget build(BuildContext context) {
    return Scaffold(
      appBar: AppBar(
        title: Text(widget.title),
      ),
      body: Padding(
        padding: const EdgeInsets.only(top: 80, left: 16),
        child: Column(
          crossAxisAlignment: CrossAxisAlignment.start,
          children: const <Widget>[
            Text(
              "心动的",
              style: TextStyle(
                fontSize: 28,
                color: Colors.black,
              ),
            ),
            Text(
              "感觉",
              style: TextStyle(
                fontSize: 48,
                color: Colors.black,
              ),
            ),
            Center(
              child: BounceWidget(
                child: FlutterLogo(
                  size: 80,
                ),
              ),
            ),
          ],
        ),
      ),
    );
  }
}
以上就是Flutter实现心动的动画特效的详细内容,更多关于Flutter动画特效的资料请关注好代码网其它相关文章!

